My family and I moved into a 1955 house during August in South Carolina. The A/C ran and ran, never seeming to turn off, even when the house felt cool enough. When the unit would kick on, it would be as loud as a plane taking off, immediately outside the little one’s bedroom.
I knew I wanted to upgrade the thermostat to a Nest, for the simple reasons of monitoring how long my system ran and the peace of mind of knowing the temperature reading would be accurate. I took my thermostat off the wall, took a picture of the wires, and headed over to the Nest Compatibility Checker. Incompatible. This disappointment led me down a rabbit hole to figure out how to make it work, how to understand my heating/cooling system, and how to make it work with my “incompatible” system.
- Check Your Compatibility
- Purchase a Nest
- My adventure in cleaning up shoddy work
- Checking your heating/cooling unit control board
- Wiring the Nest
- Setting up the Nest
Check your compatibility
Before you ever purchase a Nest, check to make sure your system is compatible. The link to get to Nest as of November 2019 is here. There are a few things, that are just flat out not going to work or be a huge headache. Things such as large stranded wires or 110/120V system. Once you verify that your wires will work, Nest gives you the option of selecting the wires that you currently see hooked up. Go ahead and take a picture of your wiring in case you or someone else can’t get things figured out. Hopefully Nest will indicate you are compatible and you are good to go, feel free to skip my story. In my case, Nest said not compatible, but I was not ready to accept that as an answer.
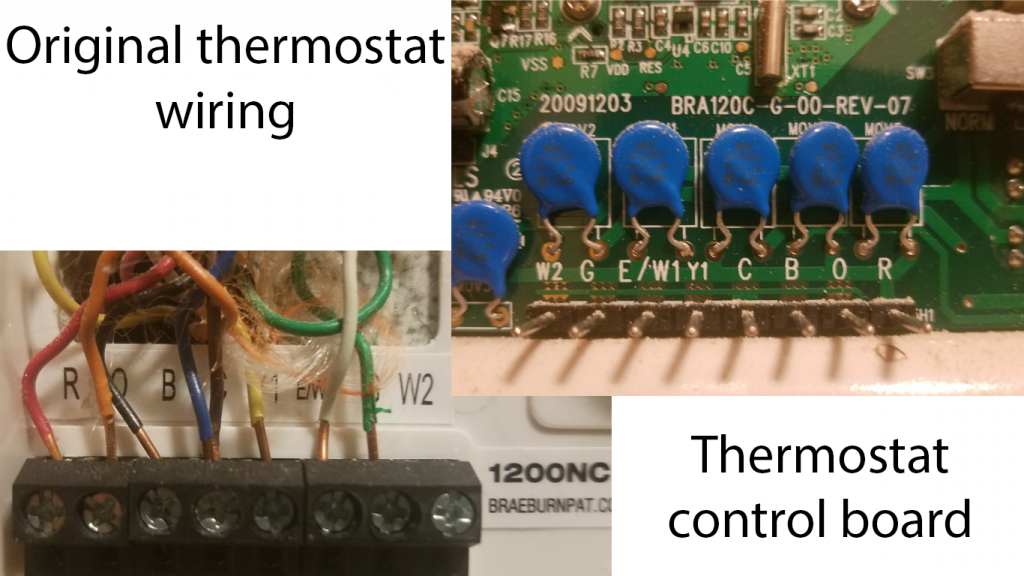
I jumped on to the chat with Nest, ready to figure out what to do. My system was definitely 24V, so it has to work with Nest. I chatted with a Nest employee, who had me upload a picture of my thermostat wiring and later a photo of my Heating/Cooling unit information sheet. I walked outside and snapped a photo of the information tag on the side of the unit. Eventually, the tech on the other end of the chat indicated my system would indeed work with Nest, but should be installed by a Nest Pro. While we were on the chat, I collected the manuals for my heating/cooling unit and my thermostat to review and try to figure out the correct wiring. I simply googled my product name and “maunal pdf” in order to get all the information I would need. I asked the tech to e-mail me a copy of the chat, but that was not an option, so I copy-pasted the whole back and forth for my records.
Purchase a Nest Learning Thermostat
Once you verify you can utilize Nest with your system, it’s time to find the best deal on the Nest Thermostat. You can spend anywhere from $100 to $300 for a Nest Thermostat. I was able to purchase my Nest Learning Thermostat, Gen 3 with a Google Home Mini and GE Smart Lightbulb for $160. I made my purchase through my energy company, Duke Energy. My previous Nest was a similar price, without any extras, from Xcel Energy in Colorado. If you buy from Nest, Lowes, or Amazon, you are looking at $250 to $300, maybe $200 for a special. Your energy company wants you to have a smart thermostat, so they will likely have the best deal. I was quite happy with the price of just the Nest, the smart speaker and smart light bulb were simply a free bonus.
Many major energy companies have an online store to help customers save energy. With Duke and Xcel, you log in to your online account as if you would pay your bill. Somewhere on the account screen is the option for an energy savings store. In there you can typically find a Nest or other smart thermostats for a significant reduction in price.
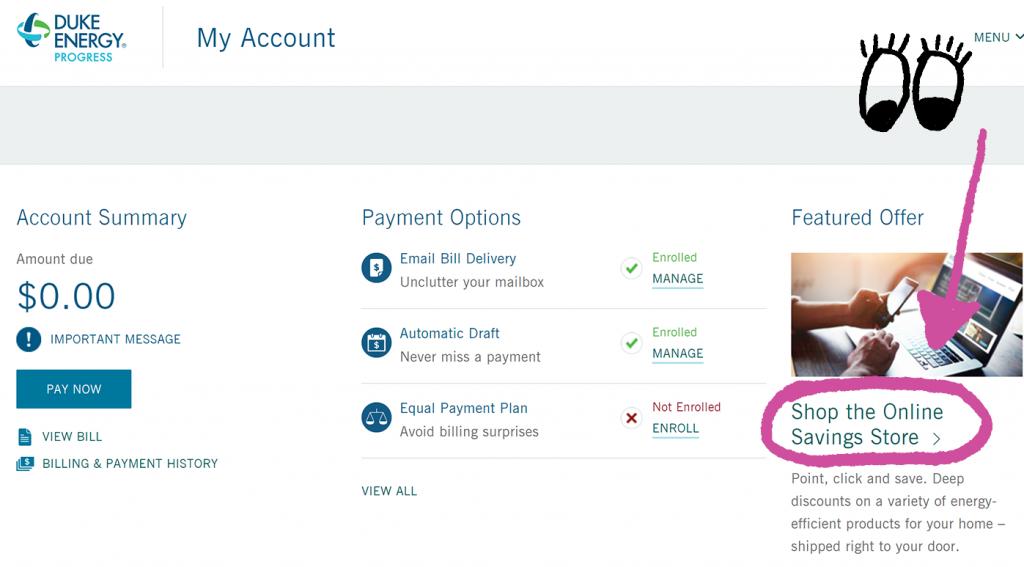
If you are unable to locate the store, contact your energy company and ask if they have any specials on smart thermostats.
An adventure in cleaning up shoddy work
With my new Nest Thermostat now in my possession, I was ready to have a Nest Pro install it. I went back and forth on whether or not to have someone come out and install it. I really believed I could do it myself, but I did not want to damage my system. I spent $99 and had a “tech pro” come out, which I found on the Nest website.
Make sure your equipment works
Before the “Pro” ever made it out I tested my heating and cooling with my current thermostat. Cool worked, albeit loud and constant, but the heat would not turn on, just the fan. My brilliant wife reminded me that the gas had been shut off when we moved in for some repair work and had not been turned back on. She turned on the gas, and I hit the heat; it fired up like expected. I could hear the flames when I stood next to the unit outside, and we could feel heat inside.
The Nest Pro “gets” things “working.”
This whole section is not to diminish a Nest Pro, he did the best he could with the wires present.
On a Saturday afternoon, the Nest Pro arrived to install our thermostat. I figured I would pay him to do it, and not get involved myself. He popped off the previous thermostat, typed in the wire configuration he saw, and then called me over to show me his phone. “This system is not compatible with Nest.” I indicated to him, yep, I have seen that message, but Nest chat tells me it will work, I just need one of you Pro’s to make it happen. After four hours of him working, calling Nest, calling his HVAC friend, he was ready to test the system. A/C worked fine, but heat would not fire up. Cool air just blew. Eventually he set the thermostat to switch to auxiliary heat for any temperature below 70F and that had things working. The Nest Pro said we are all set, but he recommended I have a local HVAC person come out and service my unit, it must not be working correctly.
My one hour clean up and install
One thing I learned while the Nest Pro was at my home, was where the control board was located on my heating and cooling unit. While the pro was at the house working on the heat, I went out and took a photo of my control board on the heating/cooling unit.
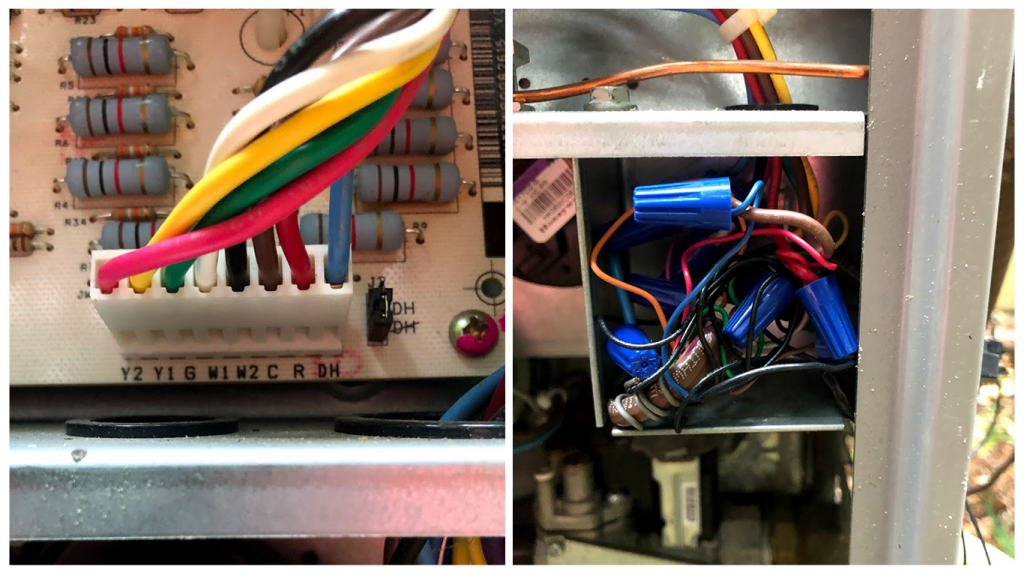
I was shocked when I looked at my control board. The wire colors coming out of the thermostat looked nothing like the thermostat wires coming out of my wall. I went back to the Nest Compatibility checker and plugged in the wires that I saw labeled on my actual heating and cooling unit. Y2, Y1, G, W1, W2, C, R, and DH. “We’re Compatible.”
It appeared to me that whoever had installed this heating/cooling unit, simply left the old thermostat and rigged the system to work. Y2, W2, and DH were not even wired into the old thermostat. It appeared to me I had a heating and cooling unit that was only half operating as intended with my current Nest setup and the previous thermostat.
My Nest Pro set the Nest up based on the previous wires. The wires and thermostat were there for a heat pump system. It was wired to provide cooling and heating via heat pump. What was happening was the fan would come for heat, but not the furnace. The Nest Pro forced the thermostat into auxilliary heat, by setting the cutoff temperature so high, which forced the furnace on when heat came on at temps below 70. I wanted my nest to work correctly, not just function.
Cleaning up the Wires
I shut off the power to my unit, and began the work of organizing the wires so the colors all matched at the unit control board, in the thermostat wires going to the house, and finally with where they plugged into the Nest. I had to reconnect many of the wires, because in a lot of situations the colors did not match up at all. I thought about just drawing what it looked like and going from there, but decided to correct the original issues in case someone ever came out to work on the system. It took about 10 minutes to match up the wires and reconnect them with a wire nut.
Once I knew what each wire was responsible for, based on the control board at the unit, I was ready to connect the wires to my nest. Most of the wires were straightforward, with the DH going into the * port.
I flipped the power back on, and plugged in the Nest. I had to go through the menus and reset it in order to start from scratch. The Nest referred me to the Nest App to begin setup. I input all my wires and the app said, “Call a Pro.” I had already been down that rabbit hole, so I continued with setup on my own. I had to enter Pro Setup on the Nest, and then when it asked for my Pro ID I was able to skip that step. Once you skip that step it is fairly straightforward.
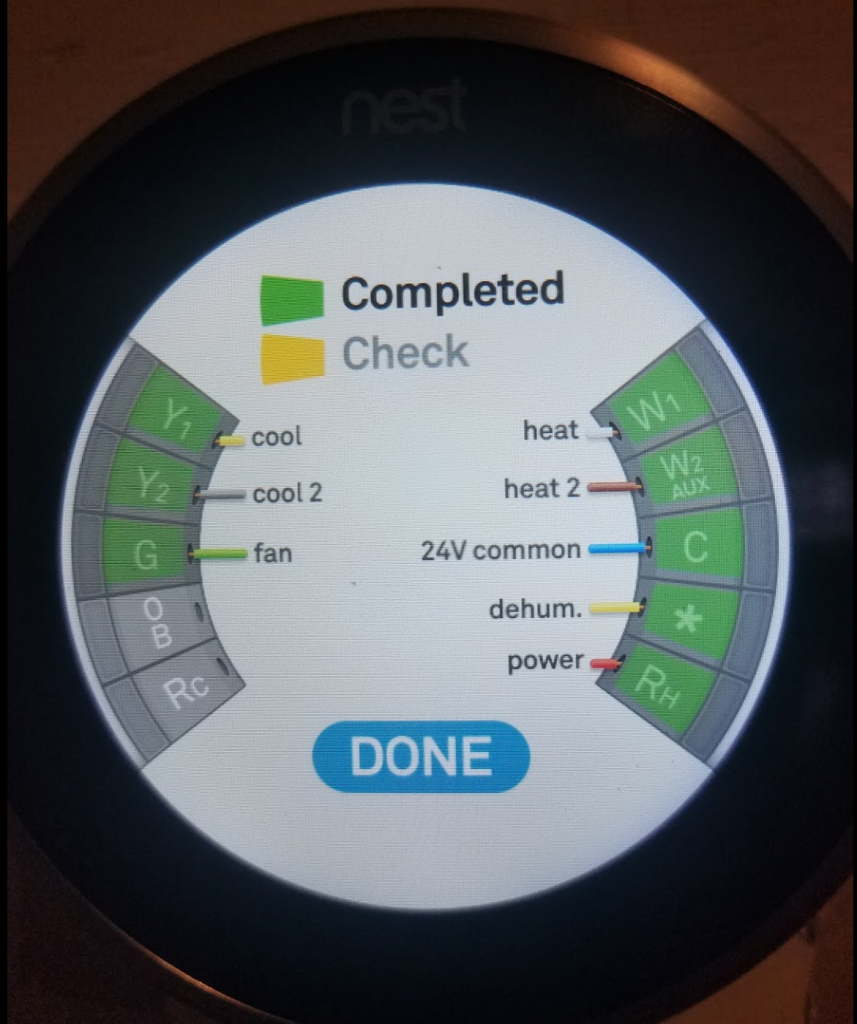
The only iffy part could be when you get to the wiring diagram. You have to tell Nest what each of your wires is connected to. The * port is a multi-use one. I selected dehumidifier for mine, since I knew it ran to DH in the heating/cooling unit.
Check the unit control board
This is where you really determine if your system will work. If you run into an incompatibility issue based on the old thermostat, check your actual unit control board to see what is wired.
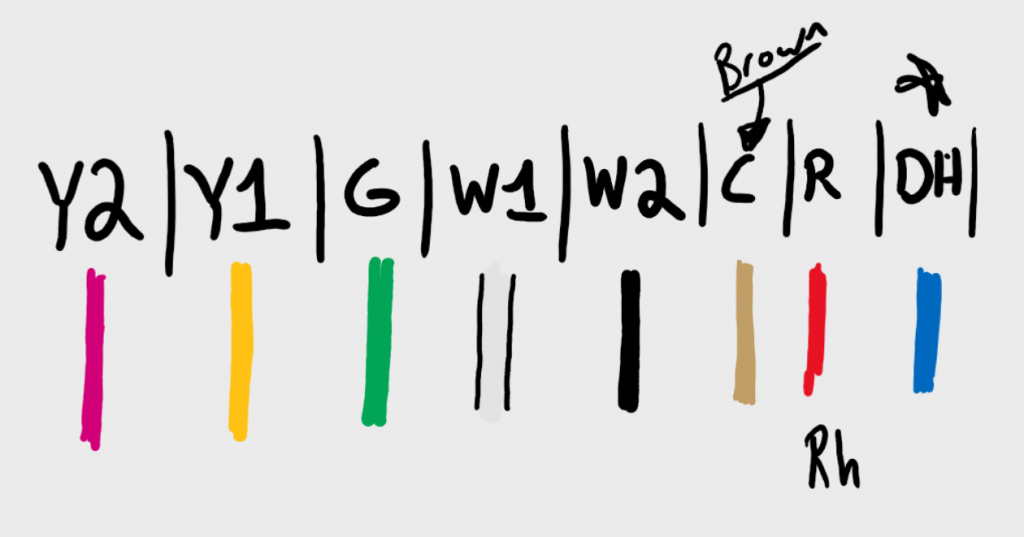
Create a wiring diagram
Some systems, Nest will not tell you how to wire, they want you to hire a Pro. Take a look at your control board, and make a diagram of where your wires are going to end up.
Set up the Nest
The phone app sort of hinders you at times, but you can still do it. Rest assured you can perform a Pro Setup, and just skip entering a PRO ID.
Header photo by Moja Msanii on Unsplash
